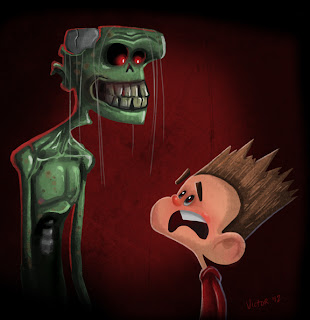
Hey guys, I actually made this tutorial to show my girlfriend how I paint in Photoshop, but I thought some of you out there may enjoy looking at it as well. 

Here's the early stage of the art- just a doodle I made in Flash.
I export as a png, and bring it into Photoshop. I turn the opacity down, set the layer to multiply, and being painting flat color.
When all the flats are done, I turn off the layer of the guide art. Now I begin rendering.
This is my favorite part. As you can see, I don't model things as they might appear in real life. I keep it somewhat flat. This is just a personal style approach. Here I made the decision to turn the zombie's mouth up, as if he were smiling, as he is not truly evil, just misunderstood.
Sometimes to give my art more visual interest, I like to add rim lights. The one on the zombie is pretty intense, but I thought it added to the horror of the moment.
Finished the zombie, now I'm rendering Norman. I threw a blue subtle rim light on his back to pop him out from the background, since he was kind of falling into the shadows. I usually hit faces with a very light red to give them a little flush to their noses and cheeks. It helps them look more alive. After I'm satisfied with the painting, I grab some kind of texture, and place it behind the characters. Usually I set the layer to multiply, and turn the opacity down to about 20%, but it depends on the illustration. All told, this painting took a little over an hour to do. If you have any questions, don't be afraid to ask. I hope you found this interesting, and thanks for reading! FINAL PIECE:


3 comments:
Thank you. As someone who is beginning to step back into their art I am almost morbidly fascinated with how other artists (whose style I hope to emulate) do what they do.
Very nice... You should get Camtasia and record the WHOLE process with commentary... THAT would be awesome...
wowsome!:)
So awesome dude thank you for posting your steps, very helpful :)
Post a Comment